Keep all of your QI supporting documents in one place by storing them within your project. Upload your files to share with your team so that they can view and download with ease. Project reports can also be located in the documents area.
Note that there is a 30MB file size limit for uploading files to Life QI.
Creating a folder for your files.
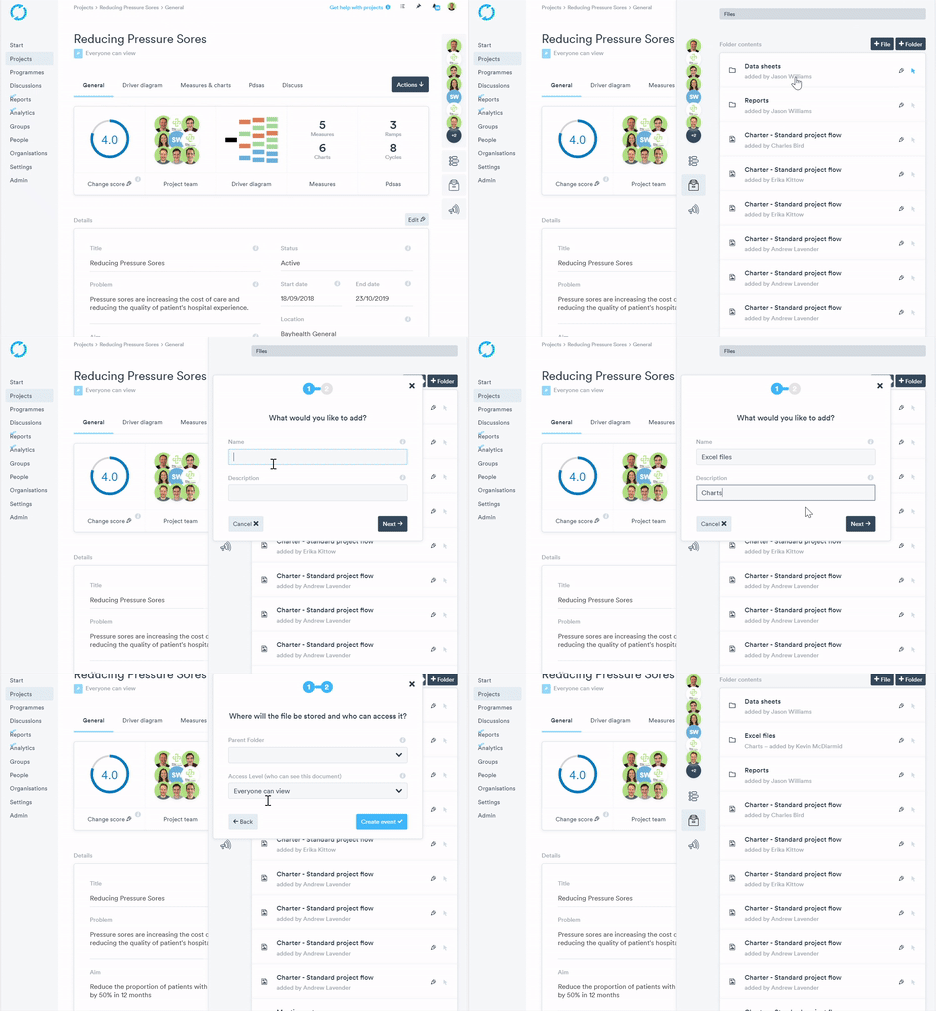
- Click the file Icon
- Click the +Folder button
- Name the folder and description then click next
- Select a parent folder if you have one already populated in the file list. You can leave it blank if you wish. If left blank this folder will be at the top level. The folder will be available for selection as a parent folder when adding extra files.
- Access level – Set everyone can view or only team members can view

Adding a file to a folder
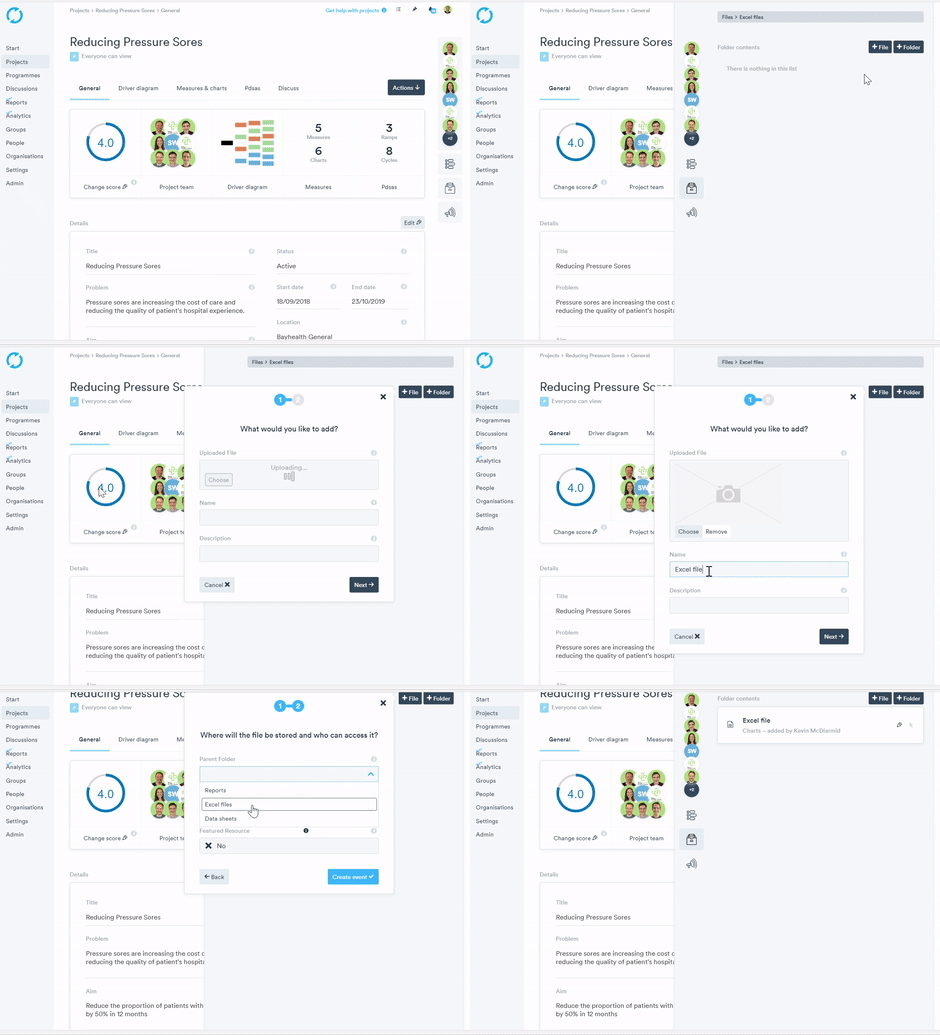
- Click the file Icon
- Click the folder you have just created
- Click the + File button
- Click the Choose button and select your file from your PC – You will see an image of a camera if the file has uploaded.
- Give the file a name and a description for the system and click next
- Select the parent folder where you would like the file to be stored
- Select the Access level
- Choose if you want this a Featured Resource
- Click Create event

Deleting a file from the file list
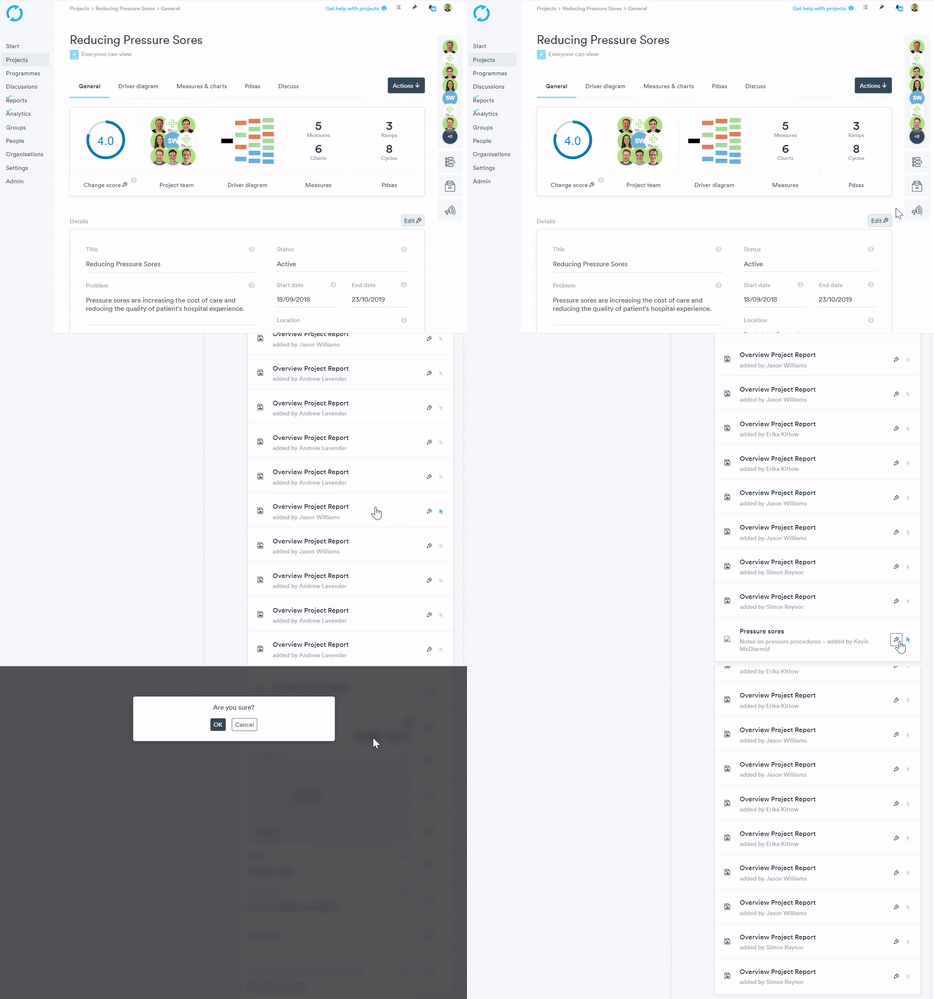
- Click the file Icon
- Click the pen Icon in the file window
- Click Delete button
- Click OK at the Are you sure? Window

Accessing folder & files
- Click the file icon
- Click the folder where your file resides
- The folder contents will then display
- If you want to edit the file details, click the pen icon
- If you would like to download the file to open from your system – Click the file name
- The file will download automatically into your downloads folder