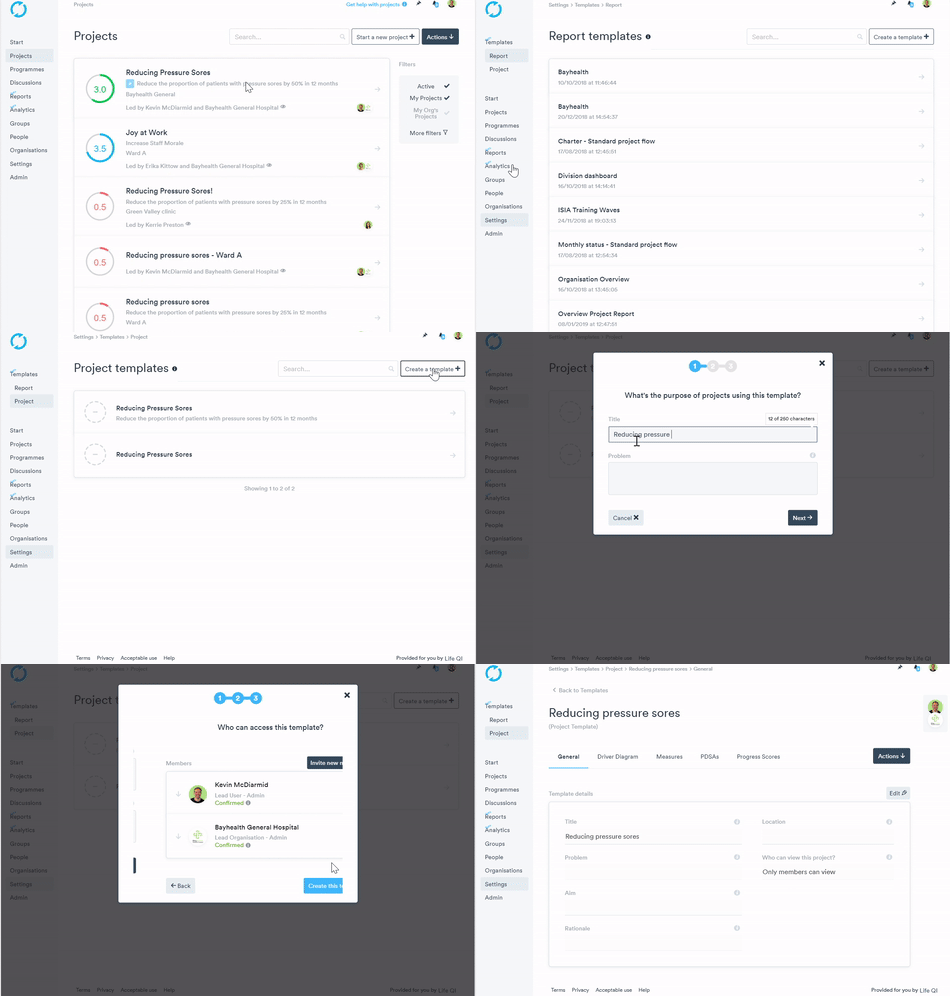
Running improvement work across a number of teams can involve a great deal of repetition. Project templates provide a single definition of work for all teams to work from. This is beneficial if you need to run the same project in multiple locations.
Watch the tutorial video or follow the step-by-step instructions below:
To create a project template:
- Click on the settings button on the left hand navigation page
- Click ‘Project’ tab under Templates
- Click ‘Create a new template’ in the top right corner
- Fill in title
- Fill in ‘Problem’ box – this will be the overarching problem for the Program
- Click next
- Fill in the Aim statement box (please note there is a tool tip button which gives examples of good & bad aim statements)
- Fill in the Rationale
- Click next
- Invite members to the template you wish to be able to access and edit etc.
- Click ‘Create template’
- Once the template is created you will need to add in your Driver Diagrams and measures that you want the project to have. :
- After project template is completed head back to your program area
- When in Program area click on the ‘Project’ tab
- Click ‘Manage project templates’
- Click on ‘Link a template’ and chose your template from the drop down list
- The next couple of windows will take you through where you want to link your Driver Diagram and Measures from – chose either project template or program (if they are the same you may not have entered any into your project template)
- Click ‘add template’

Take a look at the video below for an example of a completed project template: