Editing and colour coding your driver diagram
You can create up to twenty-two different colour-coded categories for your drivers.
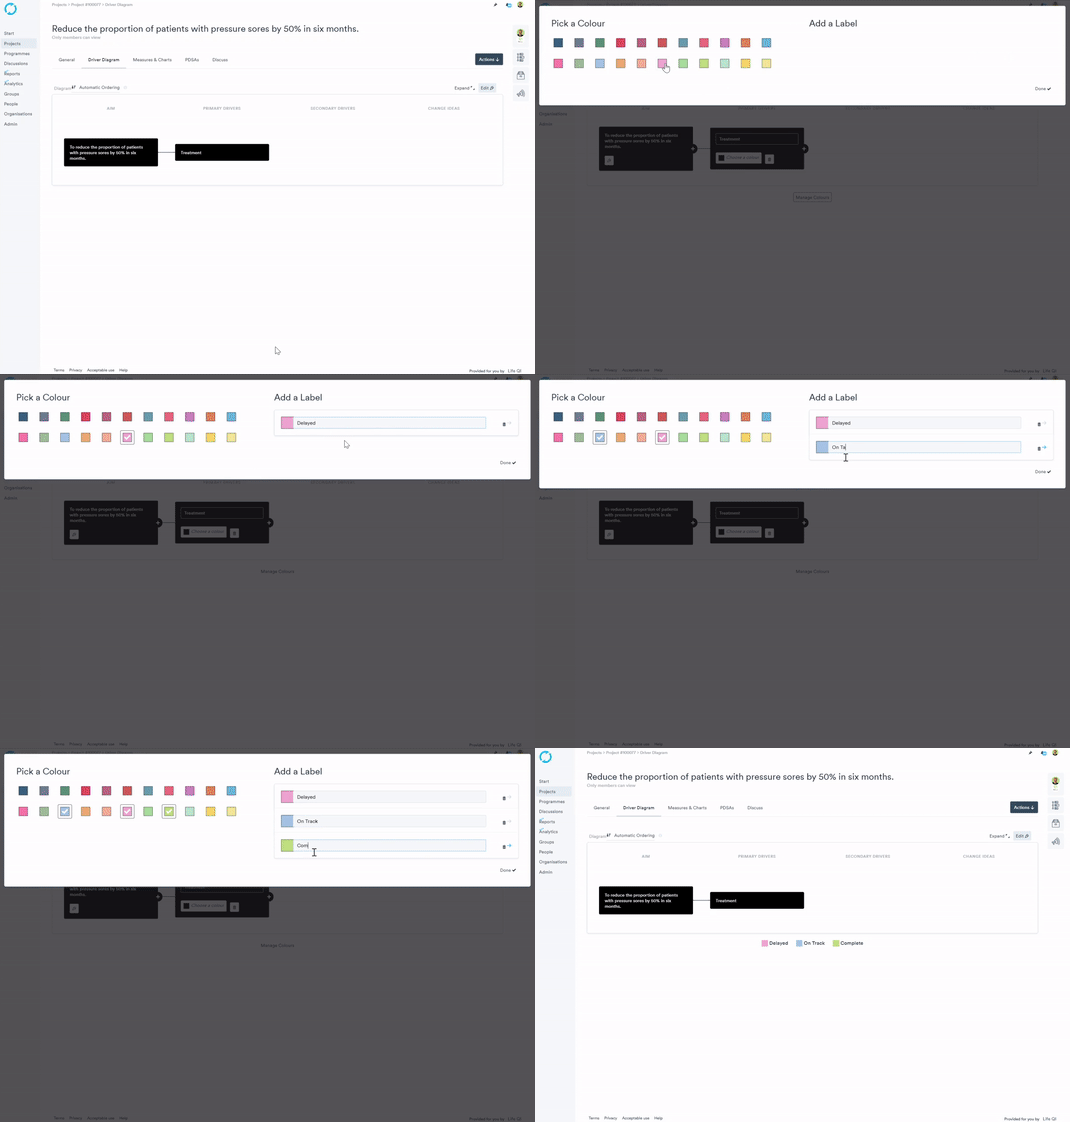
Creating a colour coded label
This colour-coding capability can be used to indicate anything that you wish. For example, location, RAG rating, level of importance, or the person responsible for each driver.
- Go to your project
- Click the'Driver Diagram' Tab
- Click the 'Edit' button.
- Scroll down to the bottom of the page and click the 'Manage colours' button below the diagram.
- Pick the colour you wish to define.
- A field will appear under the 'Add a Label' section with the chosen colour and a text field.
- Click on the 'Text Field' and add a label.
- Click 'Done'.
- Click 'Save' button on the Driver diagram page.

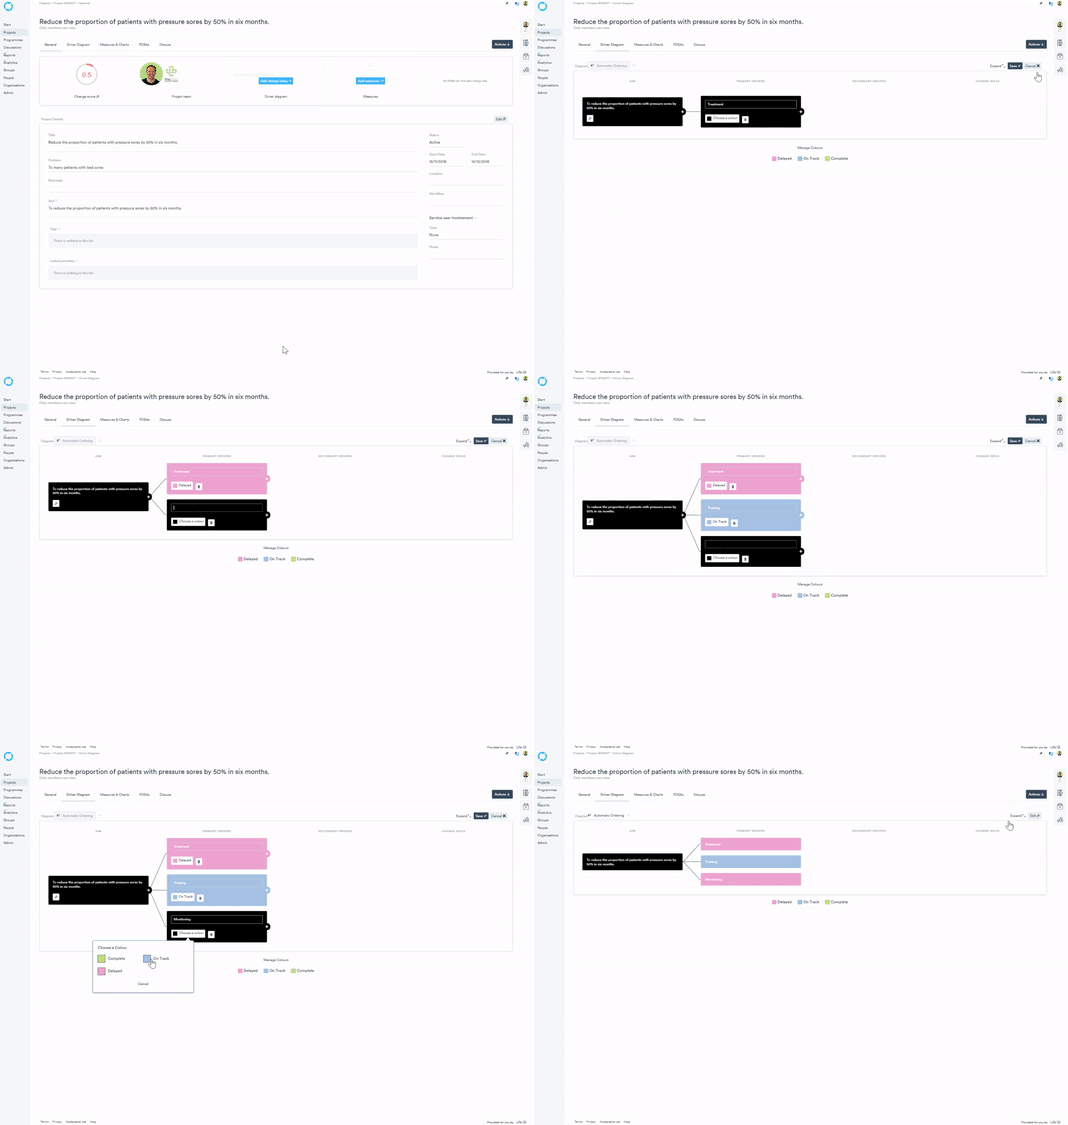
Applying the colour coded label
To colour code a new or existing driver:
- Click on the 'Edit' button on the Driver Diagram page.
- Click on the driver you would like to colour code.
- Click the rectangular button next to the wastebasket icon.
- Choose the colour/label required.
- Click 'Save'

Remove or change a colour coded label
- Click on the 'Edit' button on the Driver Diagram page.
- Click on the Driver you wish to edit.
- Click the rectangular button with the colour and possible colour label.
- Choose a different colour/label or click on 'Remove Colour' button.
- Click 'Save' button on the Driver diagram page.
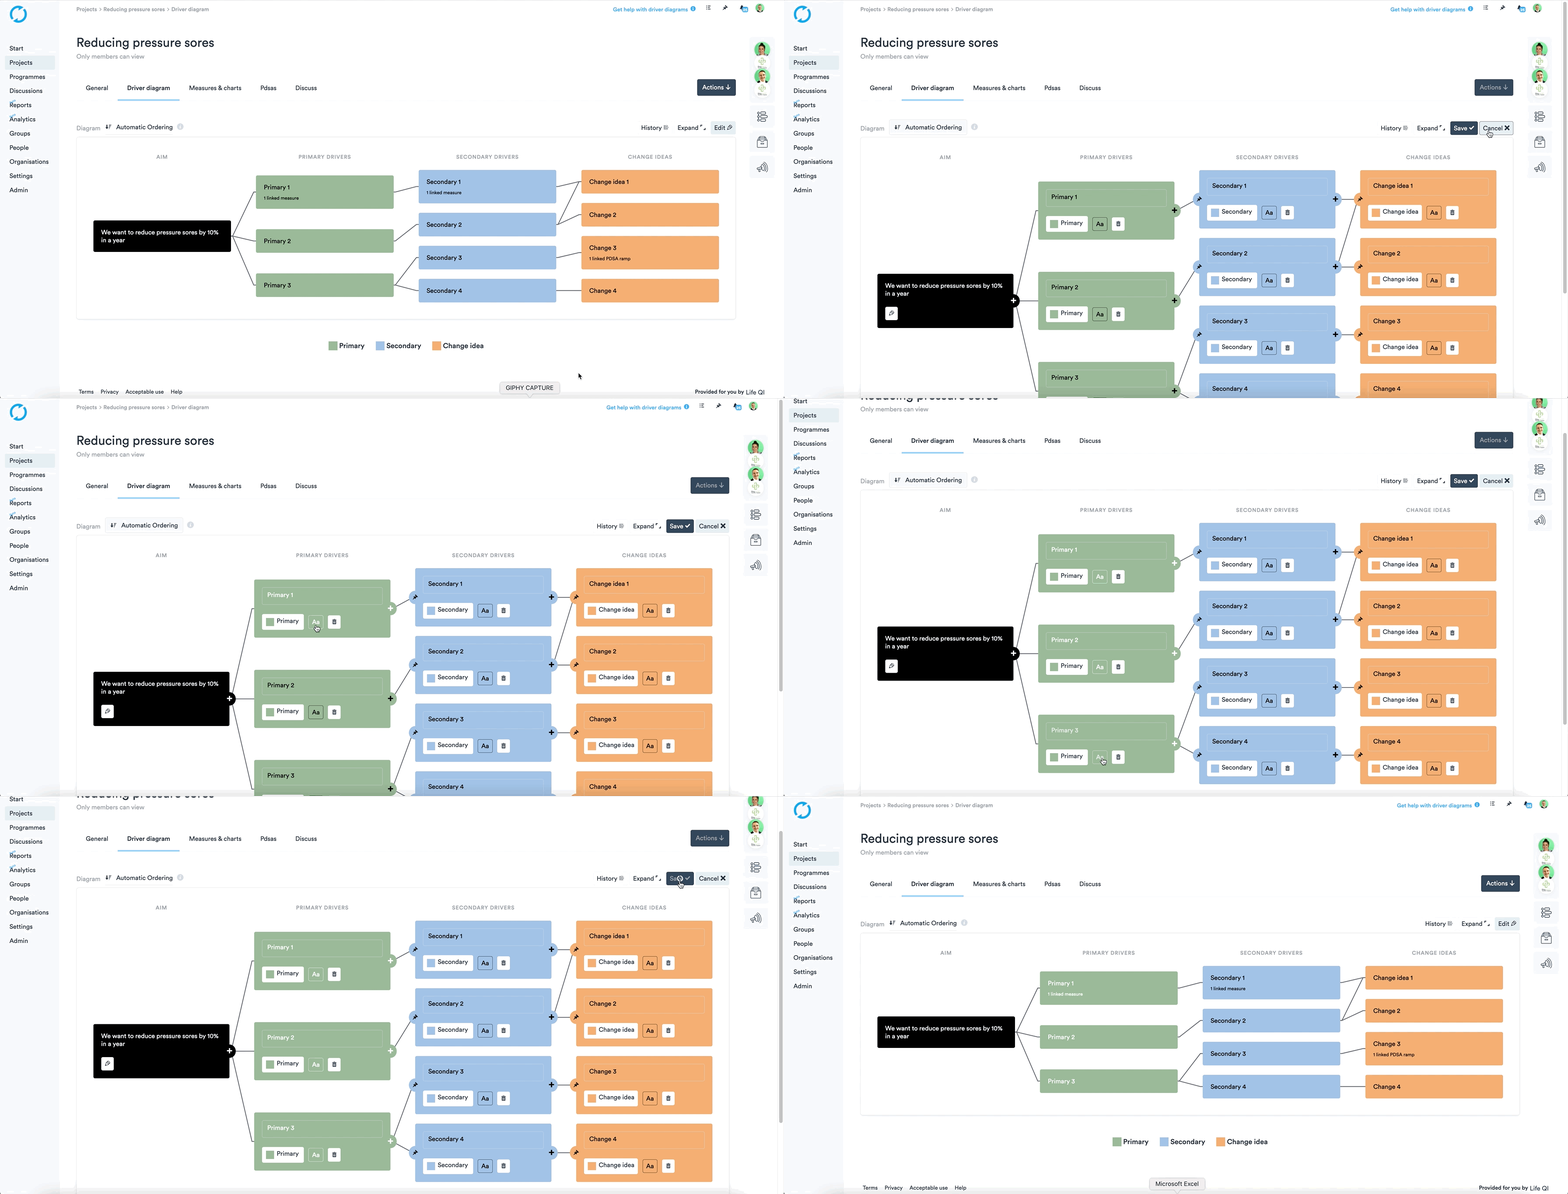
Change text colour
- Click on the 'Edit' button on the Driver Diagram page.
- Click on the Driver you wish to edit.
- Select the "Aa" button on the driver to alternate driver text colour between black and white.
- Click 'Save' button on the Driver diagram page.
