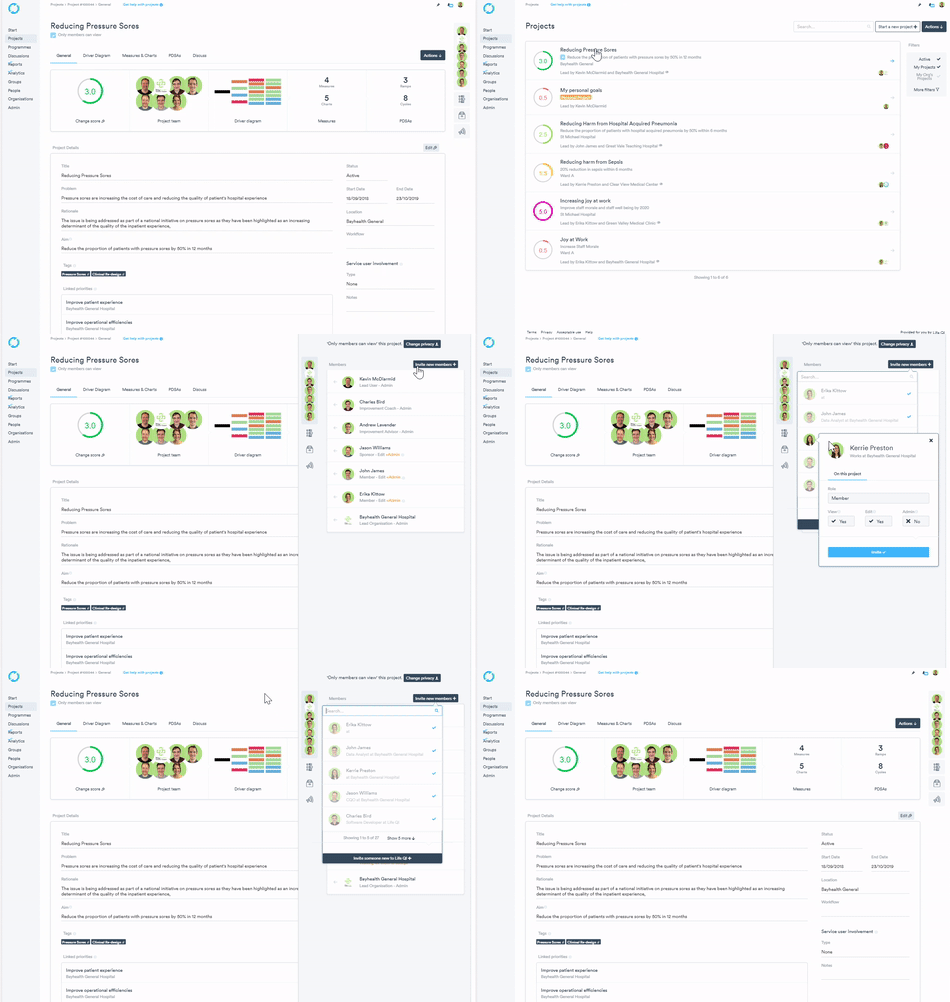
If you would like team members, organisations or groups to work on a project with you, you must invite them first. Only when they accept the invite will they be able to add data to the project.
Team members, organisations and groups can be invited to a project from the members panel. Adding them as a member means they will be shown in the list of members and depending on the permissions you grant them, contribute to your project.
To add members to your project, work through the steps in the guide below.

Only project admin users can perform this task.
- Click the members panel on the right hand side
- To invite members to your project, click 'Invite new members' button in the members section of the page.
- Search for the user and then click their name.
- Click the Invite button. The popup will automatically close and the invite has then been sent.
- You can edit their permissions while waiting for them to accept the invite. Read more on 'changing team members' editing permissions'.
- All your invited members will now be sent an invite email by the platform. Profile images will then be displayed on the 'General' page, and the members counts will be updated. Once they accept the invite you will be notified by email.
Inviting people who don't have a Life QI account to join your project
- Click the members panel on the right hand side of the page.
- Click 'Invite new members' button that appears in the members panel.
- A list of existing users will appear, at the bottom of that list you will see a 'Can't find someone?' button - click that.
- Enter the email address of the person you wish to invite.
- Click the 'Invite new user' button.
- The popup will automatically close and the invite will be sent by email to the new user. The email they receive will guide them through the sign up process. Once they have signed up they will have access to your project and when they accept your invitation onto the project you will receive an email notification to confirm this.