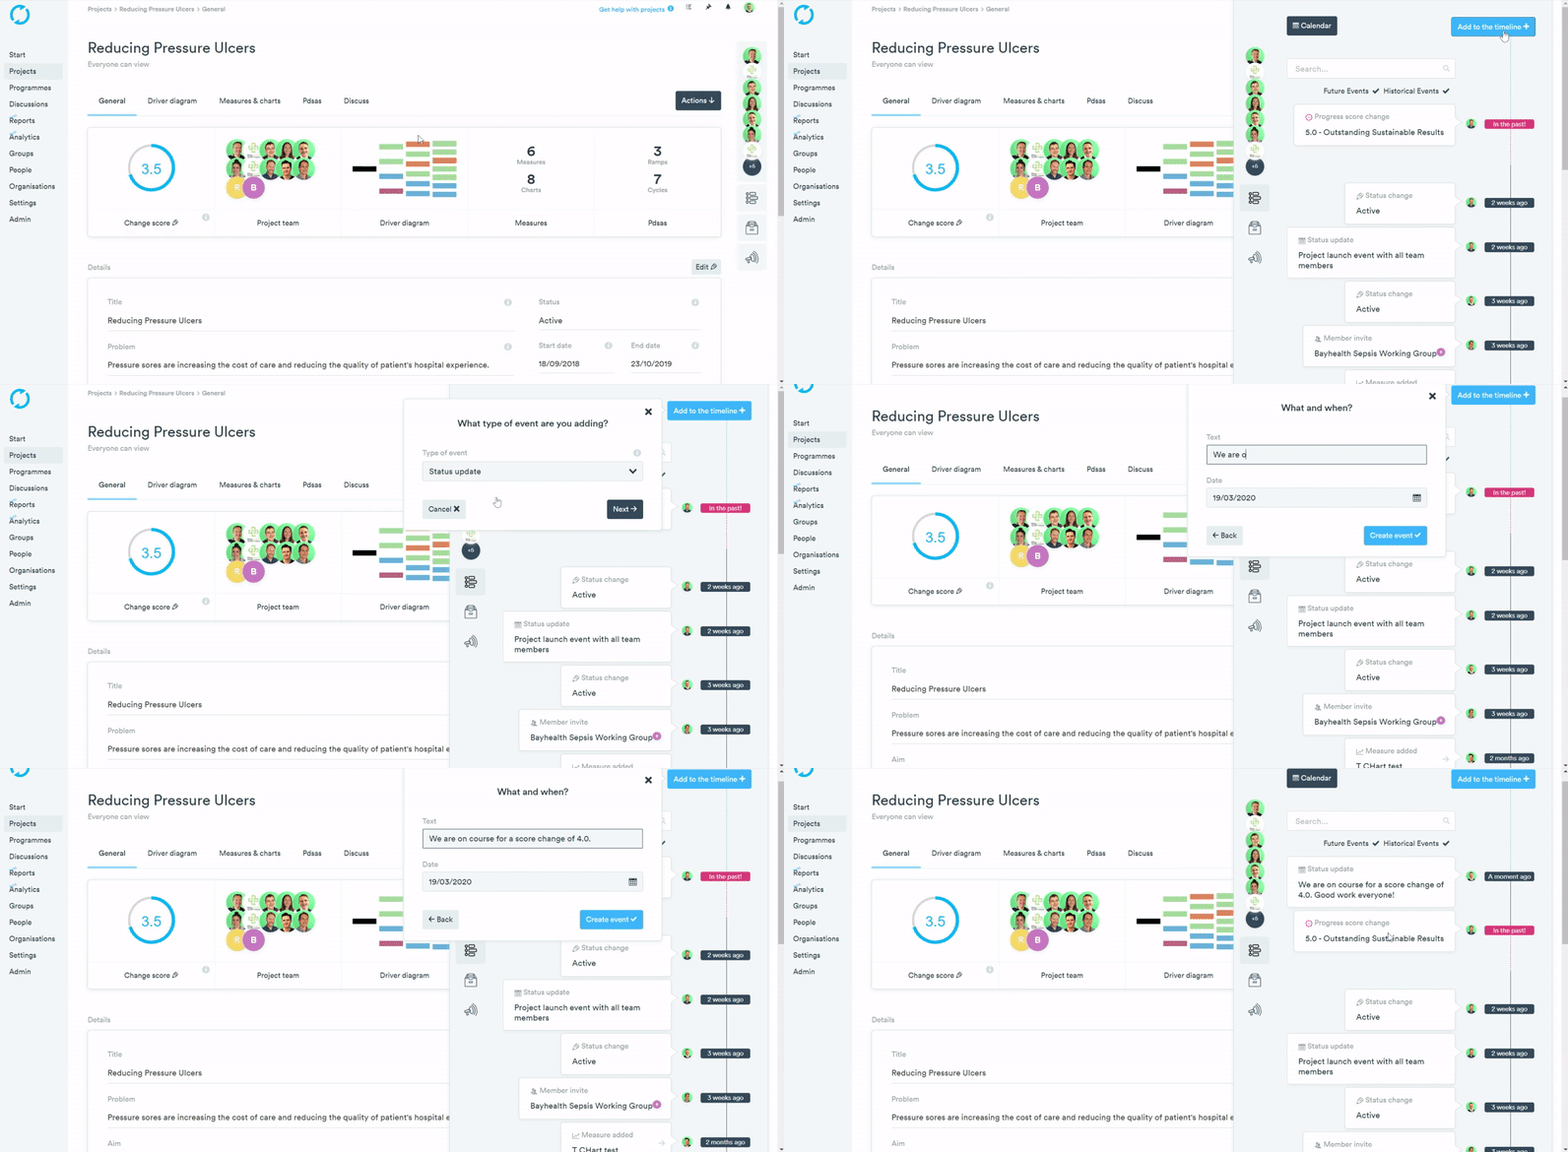
Keep your project up to date by adding in status updates, key events and also setting expected progress scores.
The use of the timeline function to record these will help document key dates and updates in the lifecycle of your project to track activity and will also be reflected in reports and dashboards.
To add an update to the timeline:
- From your Project general page, select the Timeline, underneath the members panel on the right hand side of your project.
- Select "Add to the timeline +".
- Select the event that you would like to add. Choose from:
- Status update - leave a short written update on the current status of your project, this will be picked up in reports and dashboards so it's important to leave regular updates.
- Status change - allows you to mark the project as Active, Complete, or Cancelled.
- Progress score change - allows you to set an expected progress score in the future, useful to track actual versus expected progress levels.
- Select "Create event" for the event to appear on your timeline.

This Timeline status update will now be available on any dashboard and reports that have been set to show these changes.
You can also view the Timeline status update from the Project Calendar, by selecting "Calendar", which is to the left of the "Add to the timeline +" button.
How to delete a status update:
(This is an Admin function)
- Select the Timeline button.
- Select "Calendar".
- Find and select the status update.
- Select the down arrow.
- Select Delete.