Creating and editing programme Driver Diagrams works much in the same way it does on a project.
Once created the programme Driver Diagram can be incorporated into any template projects that are setup within the programme, allowing the projects to inherit the programme diagram.
Programme Driver Diagrams are created and edited on the 'Driver Diagram'page within your programme.
Creating the aim
The Driver Diagram's aim will already be displayed as it is taken automatically from your programme's aim which you defined on the 'General' page. So if you want to edit the aim, you will need to go back to the 'General' page and change the 'Aim' box.
Adding drivers
1. Click the 'edit' button
2. The Aim is automatically pulled through from the initial set-up page you completed
3. To add a 'Primary Driver' click on the plus icon that appears on the Aim box, a new driver box will appear.
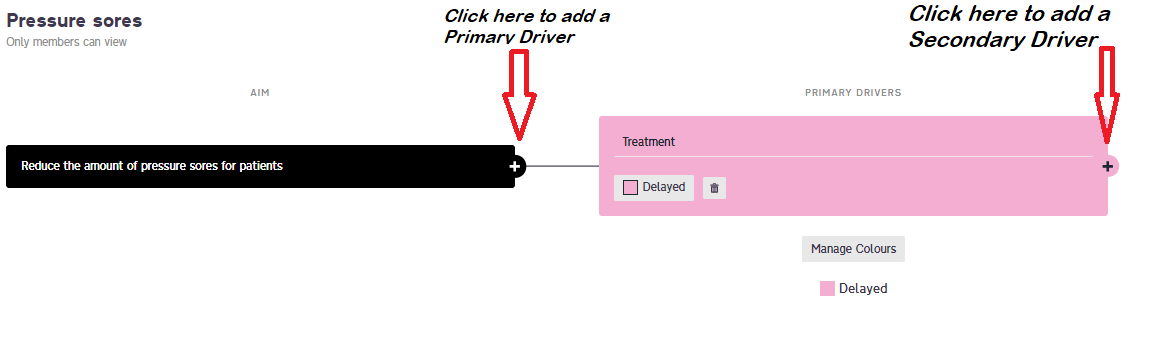
4. Type the name of the driver into the text field.
5. If relevant, colour code the driver by clicking on the 'choose a colour' link. You can find more about colour coding and labelling drivers in our learning article.
6. Click on the '+' icon to add the driver.
7. To add additional drivers, repeat steps 3 to 6.
8. To create additional links between drivers, click on the pin icon on the left side of the driver you want to add an extra link to, then click on the corresponding pin on the driver you wish to link it to.
9. Once you have finished creating your diagram, click on the 'Save' button in the top right corner.
Manual re-ordering and linking Drivers