
In this article, you'll learn how to integrate Life QI with Microsoft Entra ID. When you integrate Life QI with Microsoft Entra ID, you can:
- Control in Microsoft Entra ID who has access to Life QI.
- Enable your users to be automatically signed-in to Life QI with their Microsoft Entra accounts.
- Manage your accounts in one central location.
Please note: part of this process will require support from your Life QI Success Manager. Please contact them to discuss your interest in setting up SSO with Life QI.
This article covers:
General setup summary
- Log in to your identity provider account.
- Navigate to your applications.
- Create a new application for Life QI.
- The SSO Sign on URL will be https://<countryCode>.lifeqisystem.com/login/sso/
- countryCode is the ISO 3166-1 alpha-2 code for your country (e.g. us, uk, nl).
- https://uk.lifeqisystem.com/login/sso/
- https://us.lifeqisystem.com/login/sso/
- https://nl.lifeqisystem.com/login/sso/
- countryCode is the ISO 3166-1 alpha-2 code for your country (e.g. us, uk, nl).
- If prompted, set the username format/name ID to Email.
- The SSO Sign on URL will be https://<countryCode>.lifeqisystem.com/login/sso/
- Copy the identifier or issuer URL, the single-sign on URL, and the certificate from your identity provider.
- Navigate to /admin/subscriptions within Life QI and select your organisation's subscription.
- Go to Settings at the top of the page.
- Under 'SAML Configuration' enter the details that you copied from the identity provider.
- select Verify.
The navigation instructions and field names above may differ across identity providers. You can find more specific instructions for integrating Life QI in Entra ID below.
Instructions for Microsoft Entra ID
For Microsoft Entra ID users, an "Enterprise Application" needs to be created in Entra ID.

Entra ID prerequisites
The scenario outlined in this article assumes that you already have the following items:
- A Microsoft Entra tenant.
- One of the following Microsoft Entra ID roles: Application Administrator, Cloud Application Administrator, or Application Owner.
- A Life QI Professional or Enterprise subscription.
- A user account in Life QI with Administrator permissions.
Supported SSO methods
- Identity Provider Initiated (IdP-initiated) Single Sign-On (SSO) - allows users to authenticate directly with their Identity Provider (IdP) and then access Entra ID applications (Life QI) without needing to log in again.
- Service Provider Initiated (SP-initiated) Single Sign-On (SSO) - allows users to start the authentication process directly from the Entra ID application (Life QI).
Create an Enterprise Application for Life QI in Entra ID
To integrate Life QI with Entra ID, you must create a "Life QI" Enterprise Application
in Entra ID:
-
Sign in to the Microsoft Entra admin center as at least a Cloud Application Administrator.
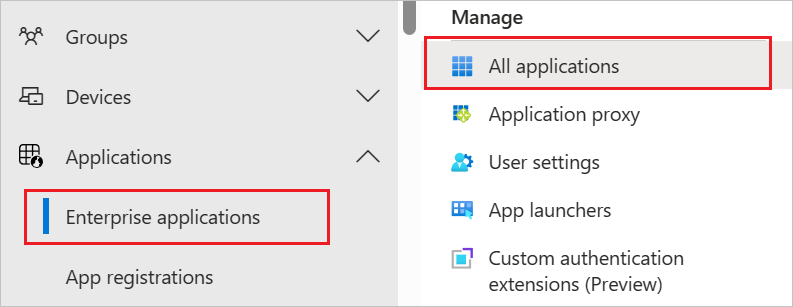
- Browse to Identity > Applications > Enterprise applications.
- Select New application.

- Select Create your own application.

- On the Create your own application pop-up, enter the following:

- You will now see the Life QI Enterprise application Overview page.

Configure single sign-on in Entra ID
In this section, you will configure single sign-on with Life QI within Entra ID.
-
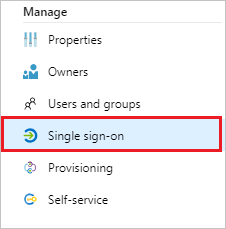
Navigate to the Life QI Application within Entra ID Enterprise Applications and select Single sign-on.
-
In the Select a single sign-on method pane, select SAML or SAML/WS-Fed mode to enable single sign-on.

-
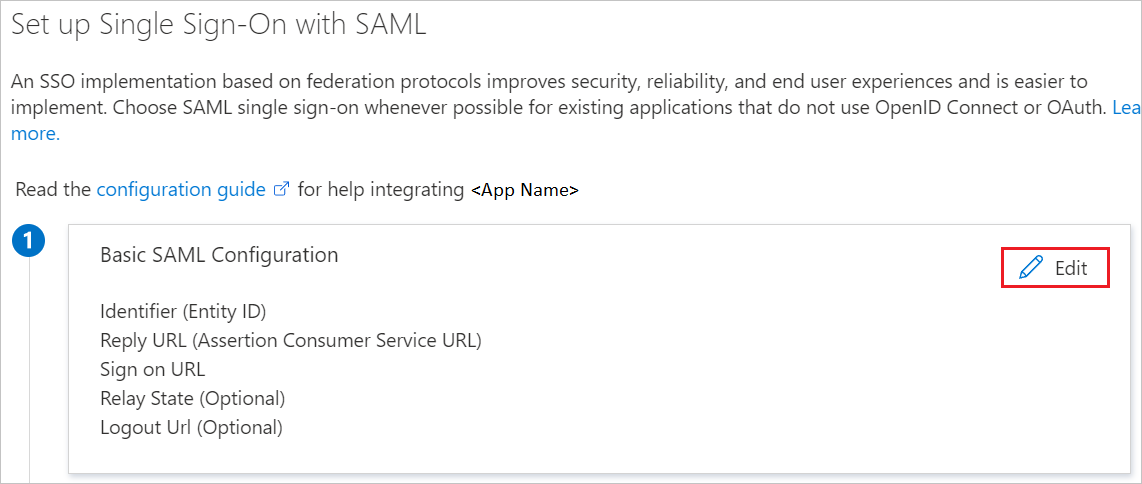
In the Set up Single Sign-On with SAML pane, select Edit (the pencil icon) to open the Basic SAML Configuration pane.
-
To configure IDP-initiated mode, complete the following steps:
-
In the Identifier URL text box, type a URL using the following pattern:
Identifier URL (Entity ID) https://<countryCode>.lifeqisystem.com/login/sso/ - In the Reply URL text box, type a URL using the following pattern:
Reply URL (Assertion Consumer Service URL) https://<countryCode>.lifeqisystem.com/login/sso/ 
-
- To configure the application in SP-initiated mode:
- In the Sign on URL text box, type a URL using the following pattern:
Sign on URL https://<countryCode>.lifeqisystem.com/login/sso/. - In the Logout URL text box, type a URL using the following pattern:
Logout URL https://<countryCode>.lifeqisystem.com/logout/
- In the Sign on URL text box, type a URL using the following pattern:
- Select Save.
- In the Set up Single Sign-On with SAML pane, select Edit (the pencil icon) to open the Attributes & Claims pane.

- Here, you will need to update the givenname and surname Claim's to firstName and lastName respectively.

- Select the givenname claim to update the claim name to firstName and then select save.

- Select the surname claim to update the claim name to lastName and then select save.

- Your Attributes & Claims should now look like this.

- Your Attributes & Claims should now look like this.
- Select the surname claim to update the claim name to lastName and then select save.
Configure single sign-on in Life QI
In this section, your Life QI Success Manager will support you in populating your Organisation's Life QI Subscription with the required SAML information you have just created in Entra ID.
Your Life QI Success Manager will require the following information:
- Issuer
- Single Sign On (SSO) URL
- Identity Provider Public Certificate

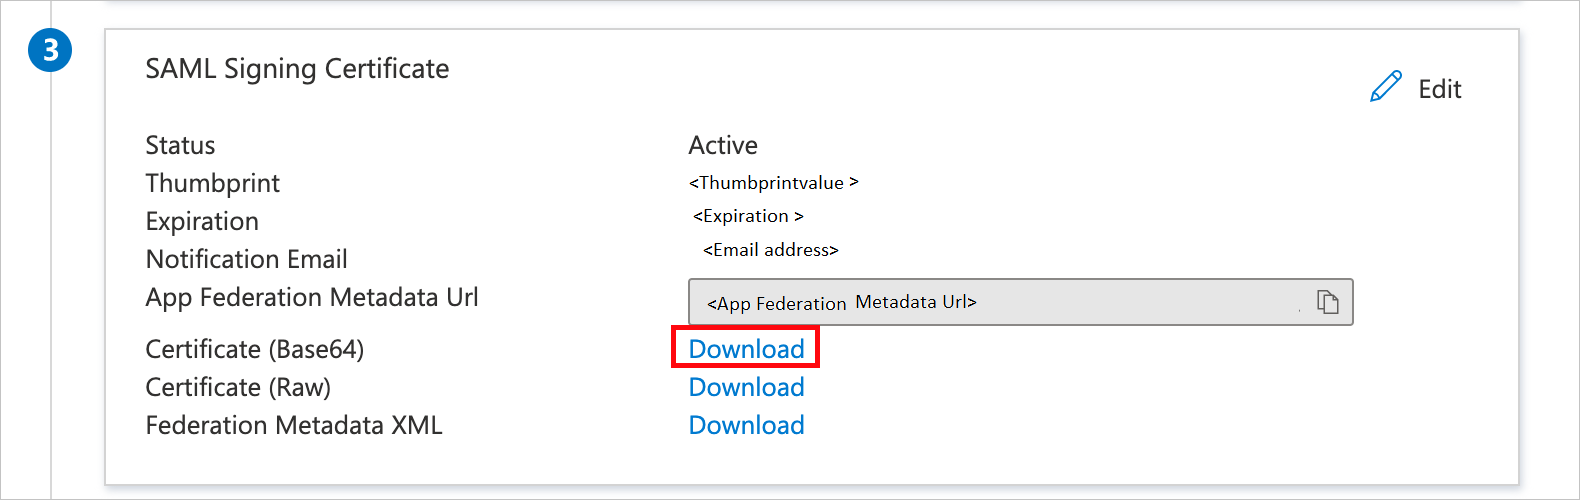
- In the Set up Single Sign-On with SAML pane, within the SAML Signing Certificate section, you will need to Download your SAML signing certificate. We recommend downloading the Certificate (Base64). Save the certificate to your device where you can find it shortly.
- If you delete or change the Active SAML Signing Certificate after completing the setup, this will break the SSO connection to Life QI. The new certificate will need to be shared with your Success Manager to enable SSO.
- For more information on managing Entra ID SSO certificates, see here.
-
In the Set up Life QI section, copy the following URLs:
- Login URL = Single Sign On (SSO) URL
- Entra ID Identifier = Issuer

Sharing the SAML information with your Life QI Success Manager
Share the following information with your Success Manager so they can configure SSO within Life QI:
- Issuer
- Single Sign On (SSO) URL
- Identity Provider Public Certificate
You can share this information by email, but should you want to share this information by an alternative method, please discuss this with your Success Manager. Once your Success Manager has input this information into your Life QI Subscription, the SSO setup will be complete.
Logging in with SSO
Navigate to https://<countryCode>.lifeqisystem.com/login/sso/ and enter your email address. Life QI will look up your subscription's single sign-on configuration and send you to your SSO provider to sign in (If you are not already logged in).
Test SSO
In this section, you test your Microsoft Entra single sign-on configuration with following options.
-
Click on Test this application, this will redirect to Life QI Sign-on URL where you can initiate the login flow.
-
Go to Life QI Sign-on URL directly and initiate the login flow from there.
-
You can use Microsoft My Apps. When you click the Slack tile in the My Apps, this will redirect to Slack Sign-on URL. For more information about the My Apps, see Introduction to the My Apps.
User provisioning

If you would like to automatically provision user accounts from Microsoft Entra ID to Life QI, see Configure Life QI for automatic user provisioning.
FAQs
Where can I get the Life QI logo so I can add it to the Enterprise Application in Entra ID?
- You can source the Life QI logo, here.
Where can I view the SAML configuration in Life QI?
- You must have access to an account with Administrator privileges who is also a member of your Organisation's subscription to be able to view this information.
- You can view this by navigating to admin > subscriptions > Subscription > settings.